Embroidery Basics
Embroidery Thread Tension Guide: Fix Looping, Puckering & Thread Breaks
 By Varmil Kakadiya11 min read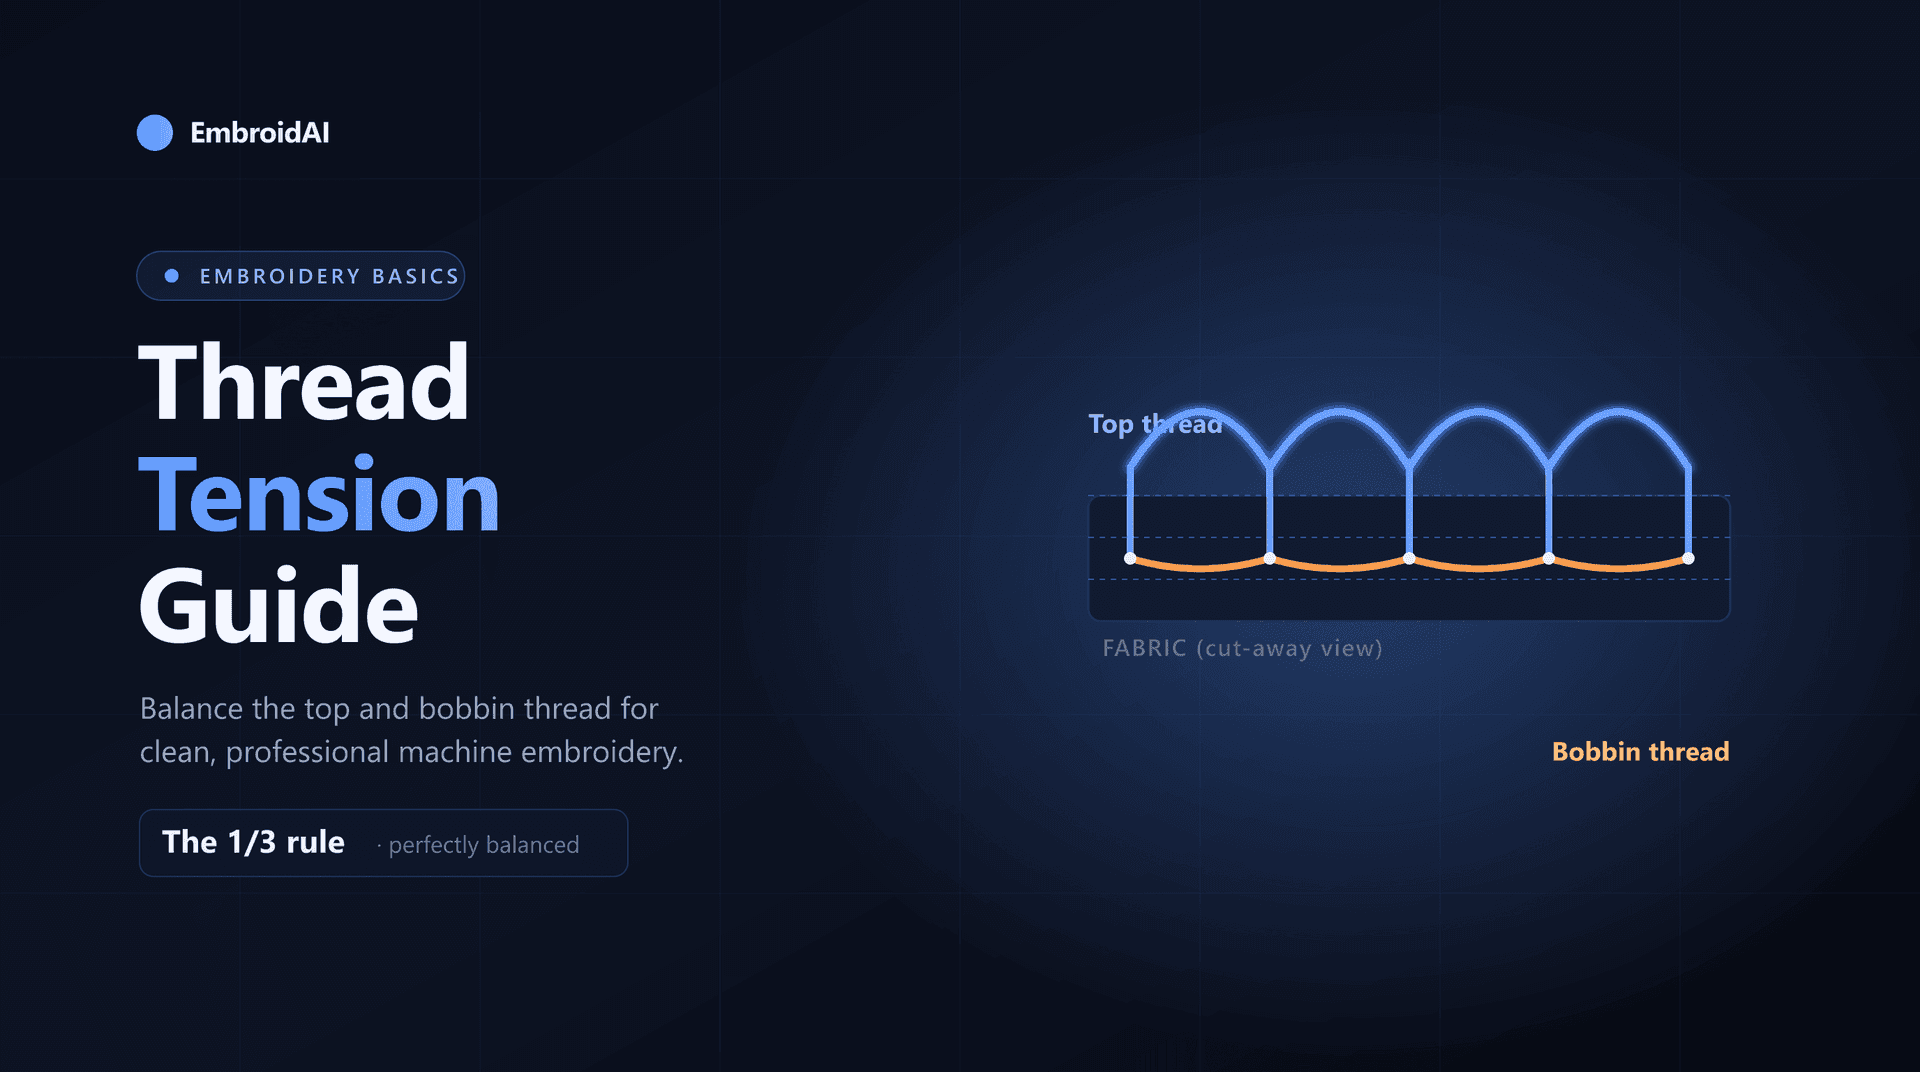
Almost every frustrating embroidery problem — bobbin thread showing on top, loops on the surface, constant thread breaks, or fabric that puckers around the design — traces back to one thing: thread tension. Get the balance right and your stitches look clean, smooth, and professional. Get it wrong and even a perfectly digitized design comes out looking rough.
This guide explains how embroidery thread tension actually works, the simple 1/3 rule that tells you when it's balanced, how to test and adjust both the top and bobbin thread, recommended settings, and a quick troubleshooting table for the most common faults.
What Is Embroidery Thread Tension?
Every machine embroidery stitch is made from two threads: the top thread that runs from the spool through the needle, and the bobbin thread that sits underneath in the bobbin case. As the needle passes through the fabric, these two threads lock together. Where that lock sits — and how tightly each thread is pulled — is what we mean by tension.
Tension is a balance, not a single setting. The top thread has its own tension (usually a dial or discs on the machine head), and the bobbin has its own tension (a small screw on the bobbin case). Good embroidery happens when those two are balanced against each other so the threads interlock cleanly inside the fabric instead of on the top or bottom surface.
The 1/3 Rule: How to Read Tension
The quickest way to check tension is to flip your stitch-out over and look at the back of a satin (column) stitch. A correctly balanced column follows the 1/3 rule: roughly one-third top thread on each side, and one-third bobbin thread running down the center.
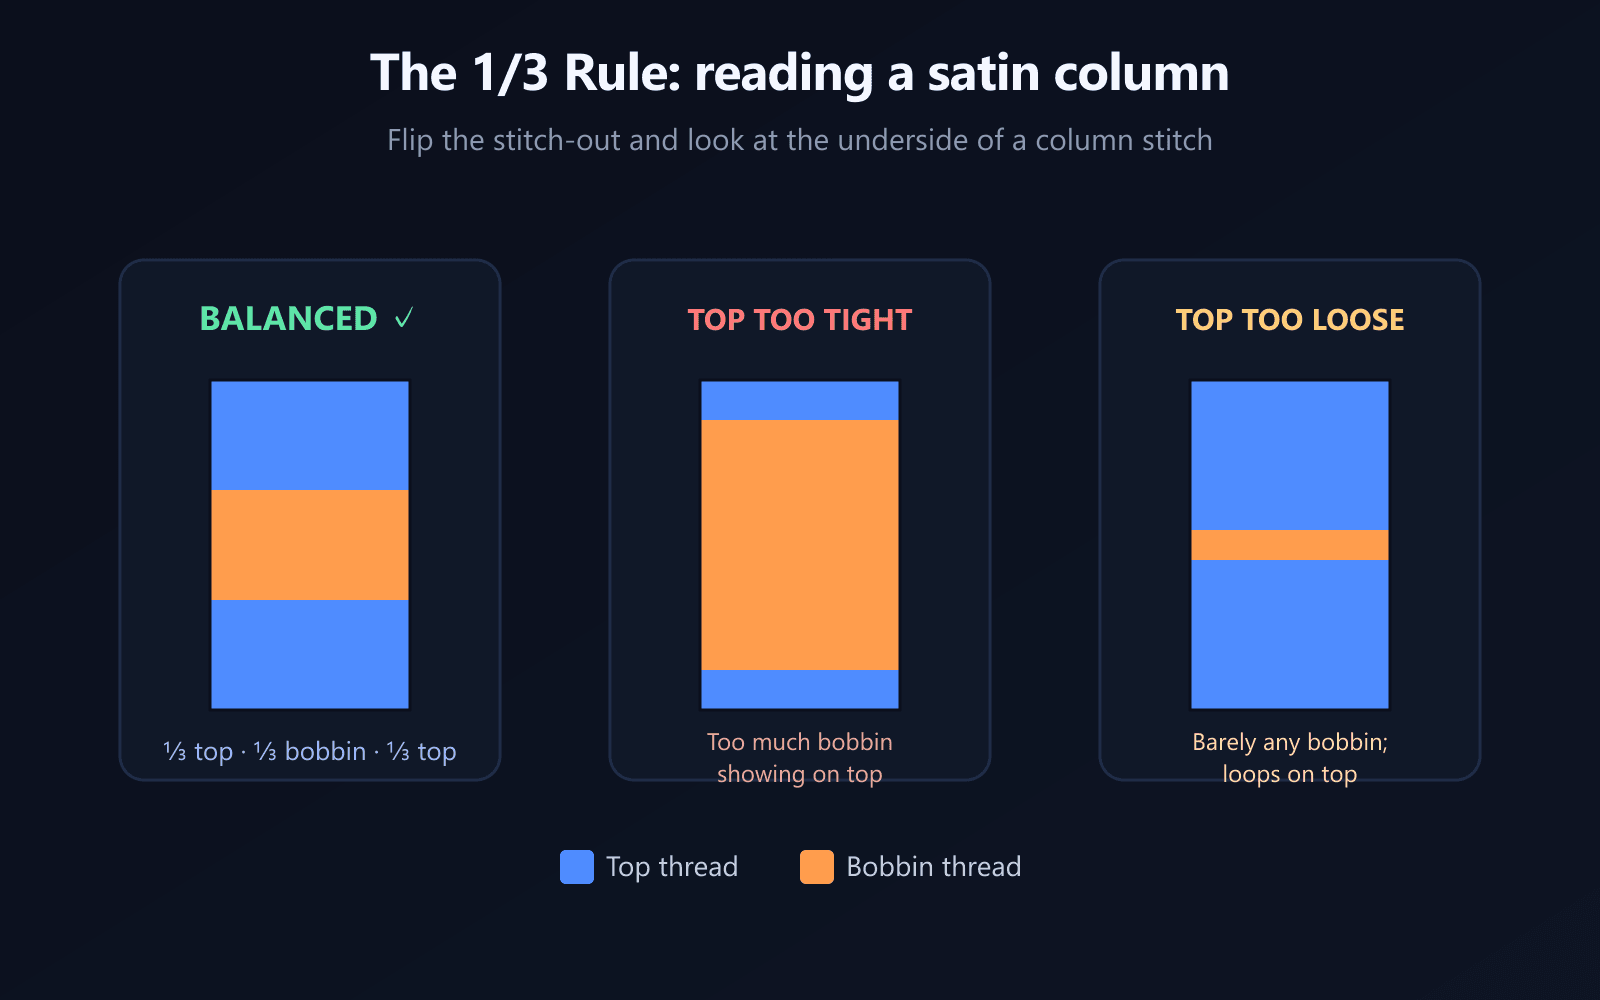
Here's what the back of the column is telling you:
- One-third bobbin down the center → tension is balanced. Leave it alone.
- Too much bobbin thread on the top surface → the top tension is too tight (or bobbin too loose).
- Barely any bobbin visible, plus loops on top → the top tension is too loose (or bobbin too tight).
Notice the trick: you diagnose the top tension by looking at how much bobbinthread shows. When the top thread is pulled too tight, it drags the bobbin thread up where you can see it. When it's too loose, it can't pull the bobbin up at all, and the excess top thread forms loops.
How to Test Your Tension
Before adjusting anything, sew a test so you know what you're working with. The classic tension test is a one-inch tall satin-stitch capital letter— an “I” or “H” works well, and many professionals stitch the word “FOX” because its letters give even-width columns at changing angles.
To run the test:
- Hoop a scrap of stable fabric with a cutaway stabilizer.
- Stitch a 1″ tall satin letter using your normal thread.
- Turn the fabric over and look at the back of the column.
- Compare what you see to the 1/3 rule above.
- Adjust, then stitch another letter and check again.
Testing on scrap first — never on the actual garment — is the single best habit for avoiding ruined projects. Fabric weight, thread type, and stabilizer all affect tension, so re-test whenever you change any of them.
Adjusting the Top Thread Tension
The top tension is the one you'll adjust most often, and on most machines it's the easiest to reach — a numbered dial or a set of tension discs on the machine head. Higher numbers mean tighter; lower numbers mean looser.
- Bobbin showing on top? Lower the top tension number (loosen).
- Loops or loose top thread on the surface? Raise the top tension number (tighten).
- Always make small changes — a quarter turn or one number at a time — then re-test.
Resist the urge to make a big correction all at once. Small, repeated adjustments let you land on balanced tension instead of swinging past it into the opposite problem.
Adjusting the Bobbin Tension
Bobbin tension is set by a tiny screw on the bobbin case. It needs adjusting far less often than the top — for most work, once it's correct you can balance everything else with the top tension. When you do adjust it, think of a clock face and turn the screw in very small increments:
- Turn the screw clockwise (toward 2–3 o'clock) to tighten the bobbin.
- Turn it counter-clockwise (toward 9–10 o'clock) to loosen the bobbin.
- Move in tiny steps — an eighth to a quarter turn — because the bobbin screw is very sensitive.
For measured accuracy, a Towa-style bobbin tension gauge takes the guesswork out: correct bobbin tension is generally 180–220 grams for flat embroidery, and up to about 250 grams for caps. (If you rely on the older “drop test,” the rough equivalent is 18–22 grams of pull — but a gauge is far more repeatable.) A tip from production shops: keep one bobbin case dialed in and dedicated to embroidery so you're not constantly re-setting it.
Tension Troubleshooting Table
Most tension complaints fall into four buckets. Use this as a quick reference at the machine:
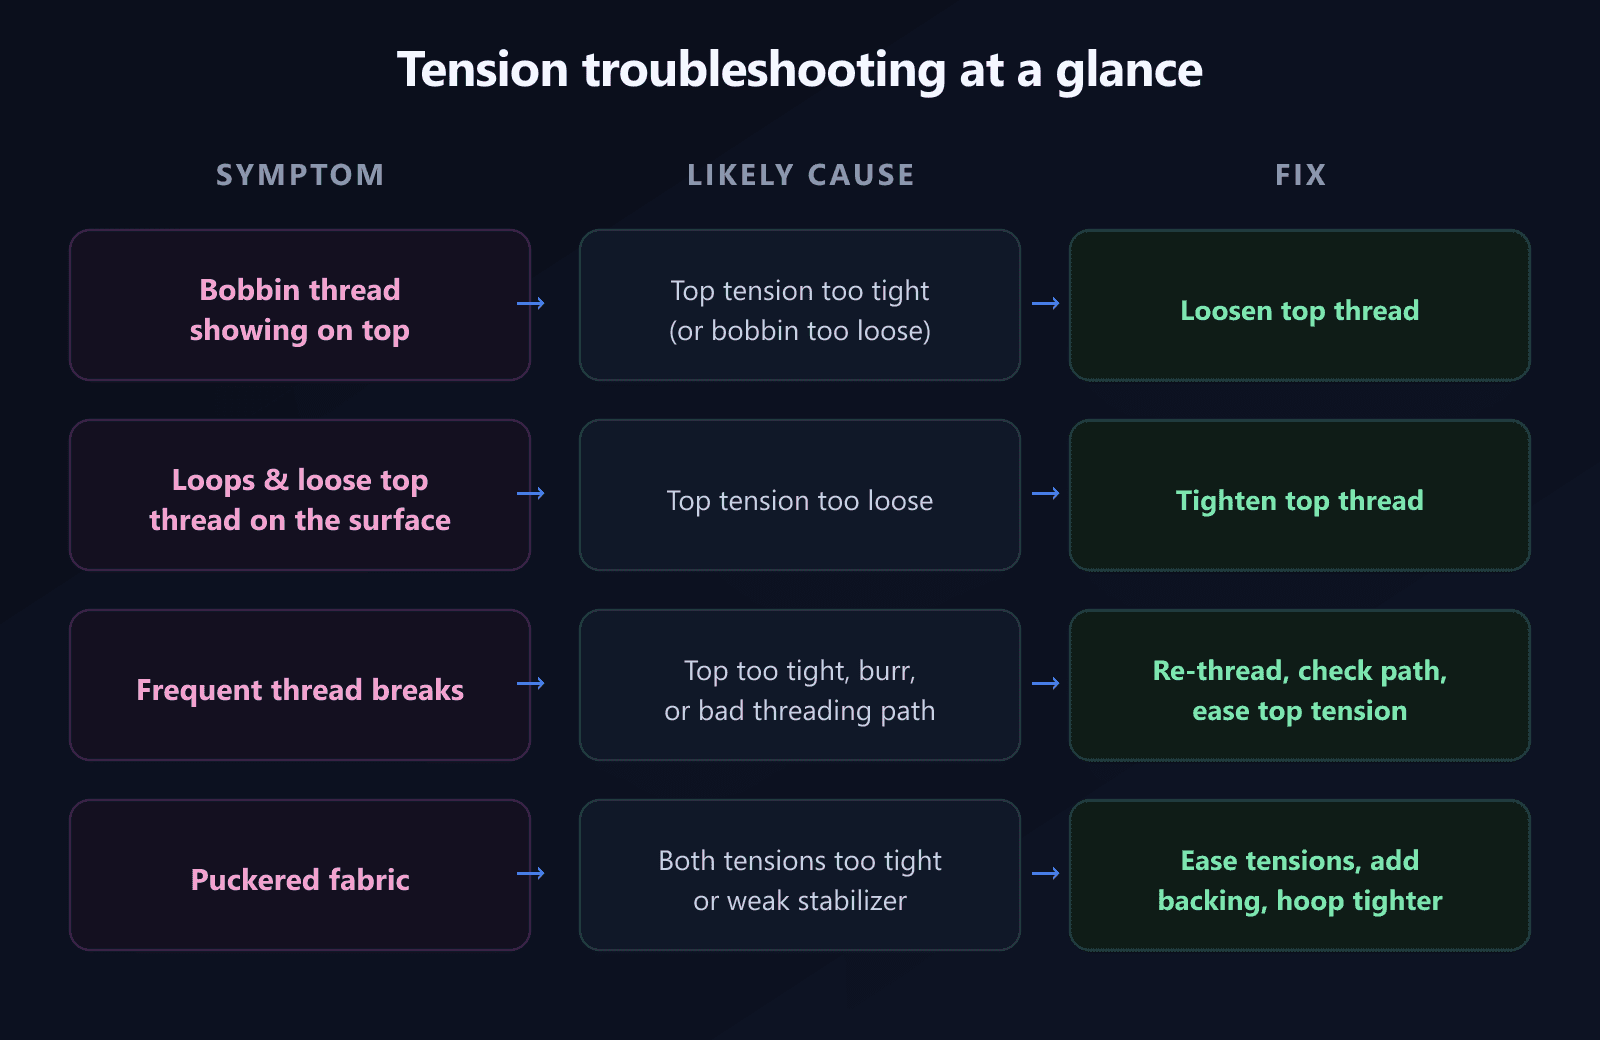
Bobbin thread showing on top
The most common fault. Your top tension is too tight (or the bobbin too loose), so the interlock is being pulled all the way to the surface. Loosen the top thread a little and re-test.
Loops and loose thread on the surface
The opposite problem: the top tension is too loose to pull the interlock down into the fabric, leaving slack top thread on the surface. Tighten the top thread slightly.
Frequent thread breaks
Thread breaks are often blamed on tension, and top tension that is too tight is indeed a common cause. But before touching the dial, re-thread the machine completely and check the thread path for snags, a burr on the needle, or an incorrectly seated bobbin — a bad threading path breaks thread even at perfect tension. Slowing the machine down and using a fresh needle also helps.
Puckered fabric
Puckering usually means both tensions are too tight, pulling the fabric inward, or that the fabric isn't adequately supported. Ease the tensions, use the right cutaway stabilizer for the fabric, and make sure the piece is hooped firmly (not stretched). Overly dense digitizing makes puckering worse, too.
Other Things That Affect Tension
Tension doesn't exist in a vacuum. If you've balanced the dials and still get poor results, check these:
- Thread quality — cheap or old thread is uneven and lints up the tension discs.
- Needle — a dull or wrong-size needle shreds thread and mimics a tension fault.
- Stabilizer — too little backing lets the fabric shift, which reads as bad tension.
- Machine speed — running too fast on delicate fabric can cause breaks and looping.
- Lint — a fluff-clogged bobbin case or tension discs throw the balance off; clean regularly.
- Digitizing — density, underlay, and pull compensation all change how much tension the fabric can take.
That last point is important: a design that's digitized well — with sensible stitch density, proper underlay, and pull compensation — is far more forgiving of small tension variations than an over-dense one.
Start with a clean, well-digitized file
Turn any logo or image into a machine-ready embroidery file with sensible density and underlay — so good tension is easy to reach.
Check the Design Before You Blame Tension
When stitches look wrong, it's worth confirming the file itself is sound before you start turning screws. A dense fill or an extreme jump count can look like a tension problem on fabric. You can inspect any design in your browser with our free DST viewer or run it through the DST analyzer to check stitch count, density, and jump stitches — the digitizing factors that make good tension easier to achieve.
Quick Tension Checklist
- Sew a 1″ satin test letter on scrap with stabilizer.
- Flip it over and check the back against the 1/3 rule.
- Bobbin on top → loosen the top thread a quarter turn.
- Loops on top → tighten the top thread a quarter turn.
- Re-test after every change; adjust one thing at a time.
- For thread breaks, re-thread and check the needle first.
- For puckering, ease tensions and improve stabilizer/hooping.
- Keep the bobbin case and tension discs clean of lint.
Conclusion
Thread tension feels mysterious until you learn to read it — and the 1/3 rule turns it into something you can see and correct in seconds. Balance the top thread against the bobbin so the interlock hides inside the fabric, make small quarter-turn adjustments, and always test on scrap first. Master that, and looping, puckering, bobbin-on-top, and most thread breaks simply stop happening.
And because good digitizing gives you more tension headroom to work with, starting from a clean, well-built embroidery file is half the battle. If you need one, the EmbroidAI image-to-embroidery converter turns your artwork into a machine-ready design in seconds.
Frequently Asked Questions
What is the 1/3 rule in embroidery tension?
The 1/3 rule says a correctly balanced column stitch, viewed from the back, should show about one-third top thread on each edge and one-third bobbin thread down the center. If you see much more or much less bobbin in the middle, your tension needs adjusting.
Why is my bobbin thread showing on top of my embroidery?
Bobbin thread pulling up to the top surface means the upper (top) tension is too tight, or the bobbin tension is too loose. Loosen the top thread tension slightly — a quarter turn at a time — until the bobbin thread stays on the underside.
What should embroidery bobbin tension be set to?
Measured with a Towa-style gauge, bobbin tension is typically 180–220 grams for flat embroidery and up to about 250 grams for caps. If you use the older bobbin drop test, the equivalent reading is roughly 18–22 grams of resistance.
How do I test my embroidery machine tension?
Sew a one-inch tall satin-stitch capital letter — an 'I', 'H', or the word 'FOX' — on scrap fabric with a stabilizer. Flip it over and check the back against the 1/3 rule. This shows how the machine handles tension as the design moves in different directions.
How much should I turn the tension dial at a time?
Adjust in small steps — a quarter turn or less — then sew another test and re-check. Small changes let you home in on balanced tension without overshooting and creating the opposite problem.
Can bad digitizing cause tension problems?
Yes. Overly dense fills, satin columns that are too wide, and missing underlay can look like tension faults even when the machine is set correctly. Clean digitizing — proper density, underlay, and pull compensation — makes good tension much easier to achieve.