Embroidery Basics
What Is Machine Embroidery? A Complete Beginner's Guide
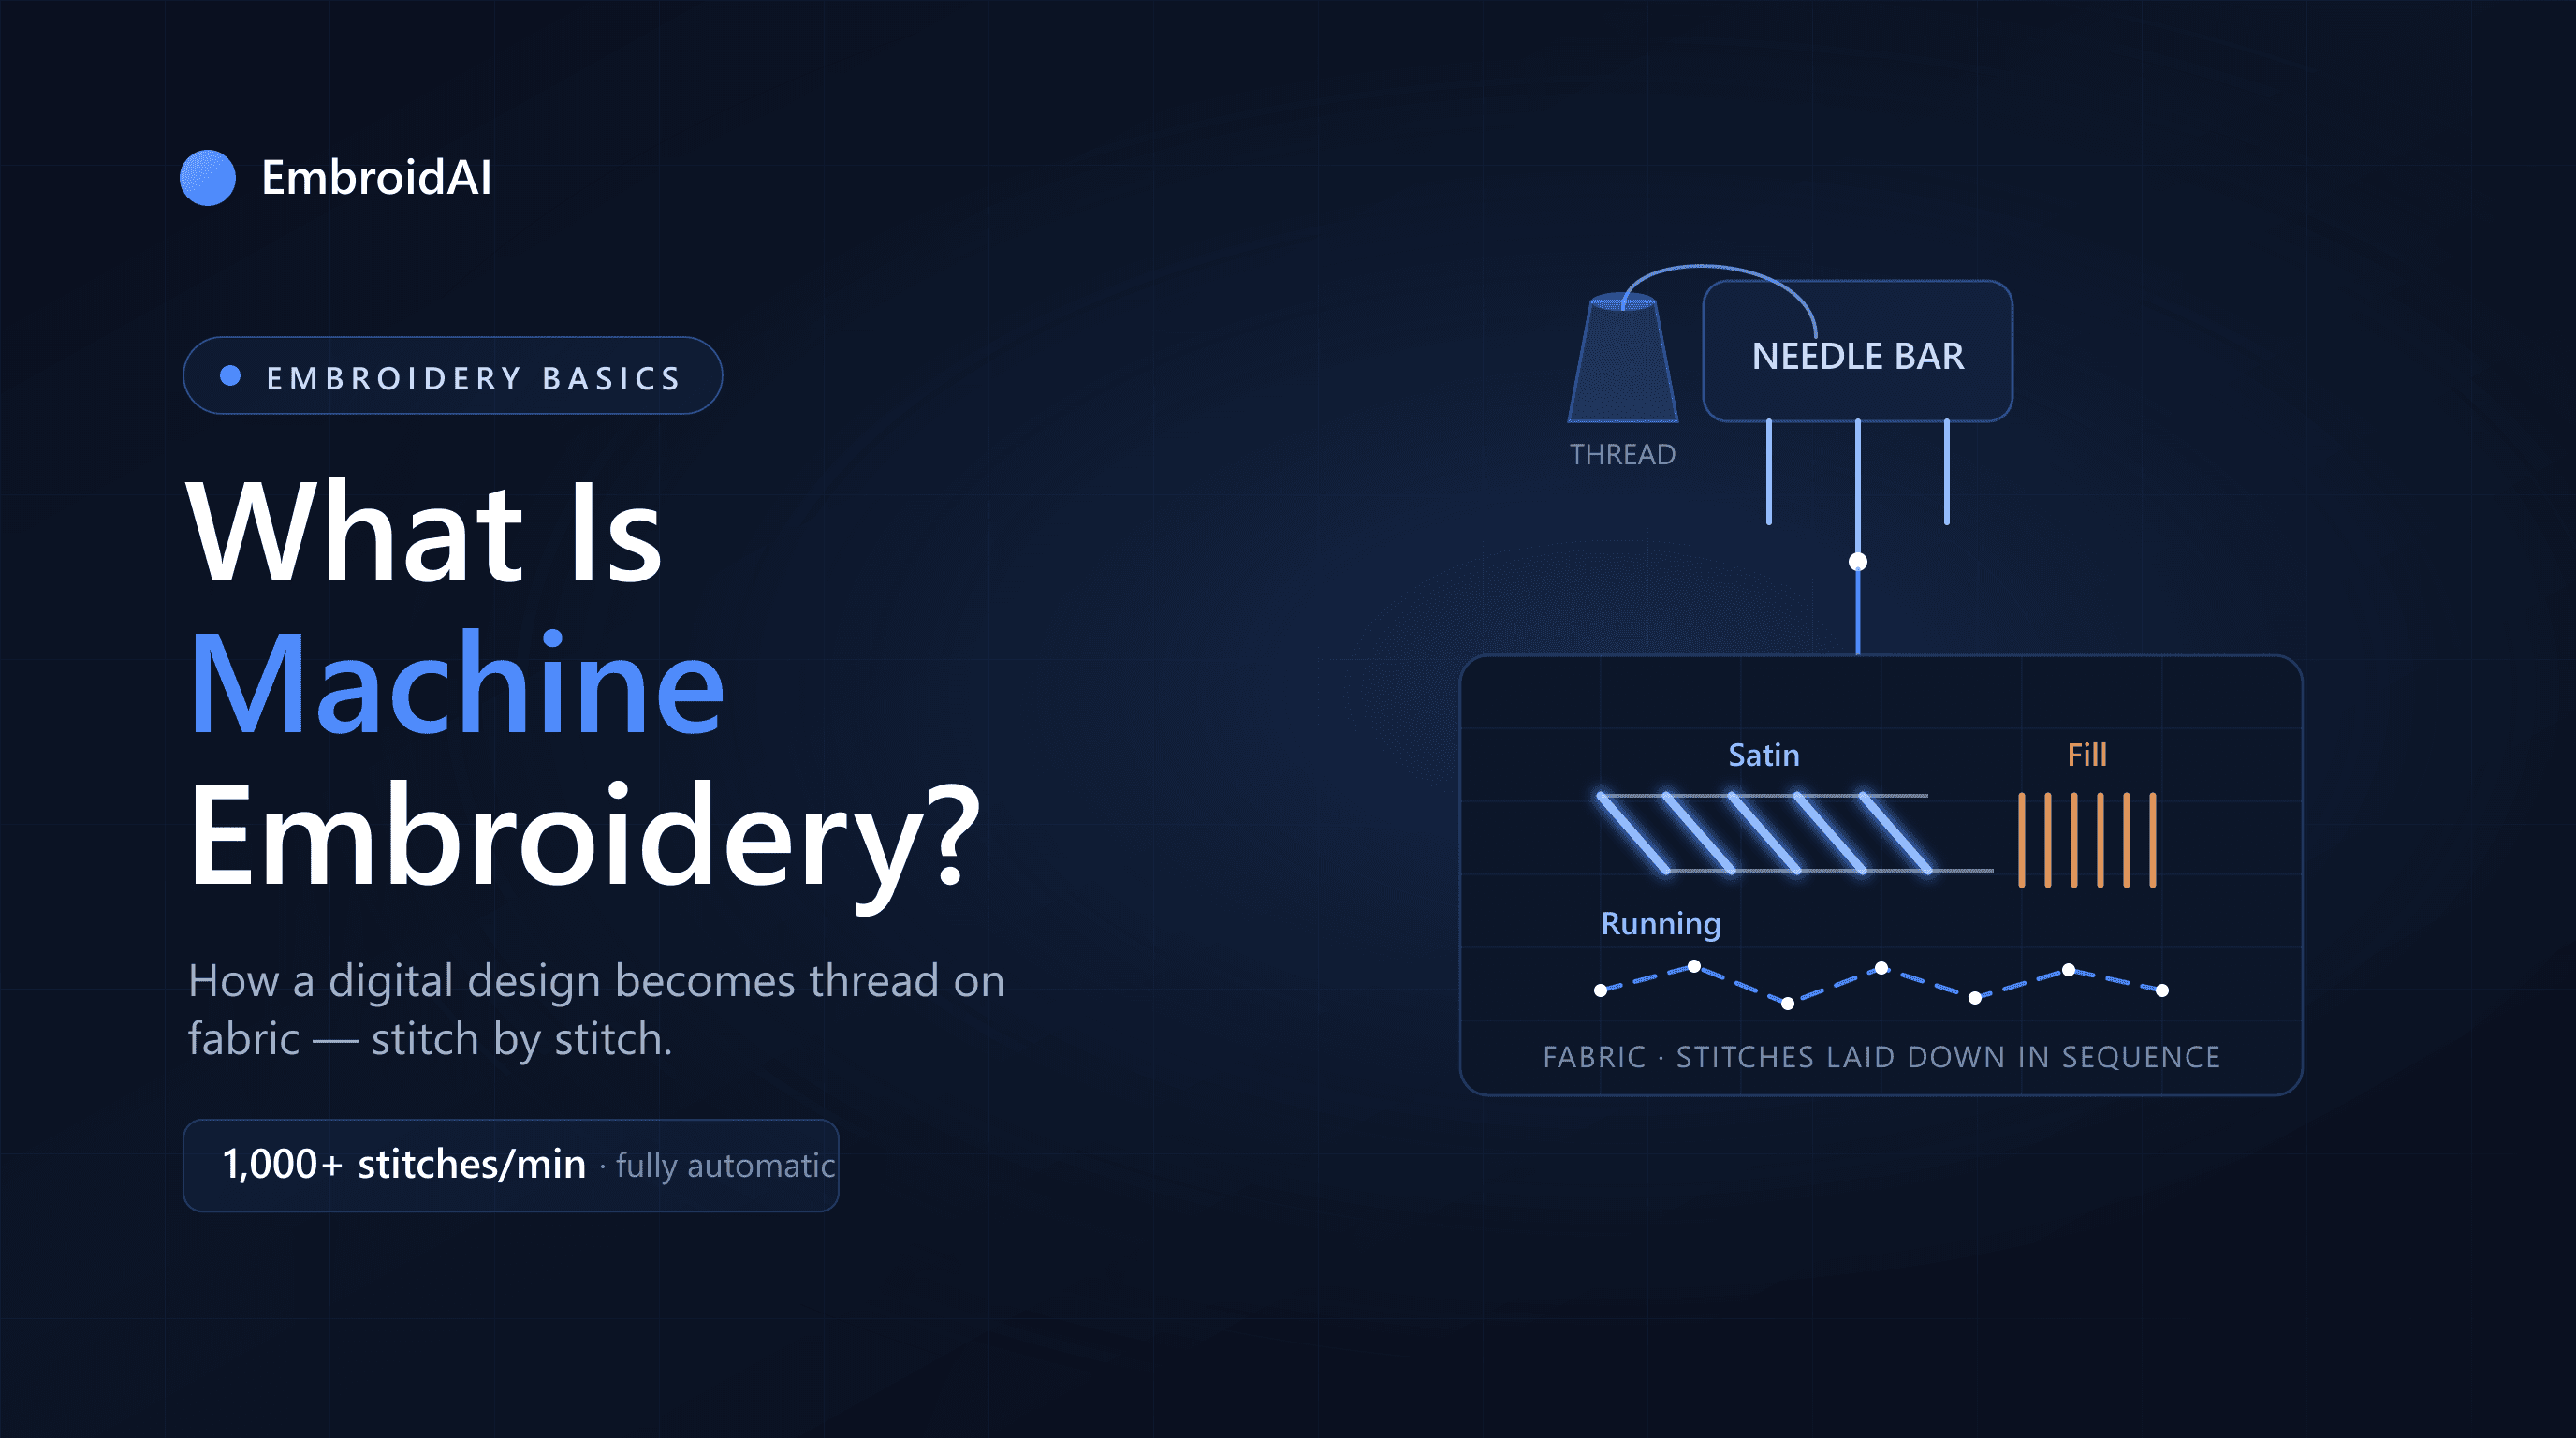
Look at the logo on a work polo, the name on a team cap, or the monogram on a towel. Almost none of it was stitched by hand. It's machine embroidery — a design translated into thread by a computerized machine that can place well over a thousand stitches a minute without a human touching the needle.
If you're new to the craft, the vocabulary can be intimidating: digitizing, stabilizer, satin stitch, DST files, pull compensation. This guide walks through all of it in plain language — what machine embroidery actually is, how the process works from artwork to finished garment, the equipment you need, what it costs, and the mistakes that trip up nearly every beginner.
What Is Machine Embroidery?
Machine embroidery is the process of decorating fabric with thread using a computerized embroidery machine. Rather than guiding a needle by hand, you load a digital stitch file into the machine. That file is a set of instructions: it tells the machine every needle position, which stitch types to form, when to trim the thread, and when to stop for a color change.
The fabric itself is held taut in a hoop, which the machine moves beneath a fixed needle. This is the key mental flip for beginners: the needle goes up and down in one place, and the fabric moves. The design is drawn by shifting the hoop in tiny, precise increments between stitches.
Because everything is driven by a file, the results are repeatable. Stitch the same design onto two hundred shirts and the two hundredth is identical to the first — which is exactly why machine embroidery dominates uniforms, corporate apparel, caps, and promotional merchandise.
Machine Embroidery vs Hand Embroidery
Both produce thread on fabric, but they serve very different purposes:
- Speed: a design that takes hours by hand often stitches out in a few minutes by machine.
- Consistency: hand embroidery varies piece to piece; machine embroidery is identical every run.
- Setup cost: hand embroidery needs a needle, hoop, and floss. Machine embroidery needs a machine, software, and digitizing.
- Best for: hand embroidery suits one-off art pieces and heirloom work; machine embroidery suits production, branding, and anything repeated.
Neither is “better.” They're different tools. Machine embroidery trades the expressive irregularity of hand stitching for speed and precision.
How Machine Embroidery Works
Every embroidered garment travels the same five-stage path, from a flat image to thread locked into fabric.
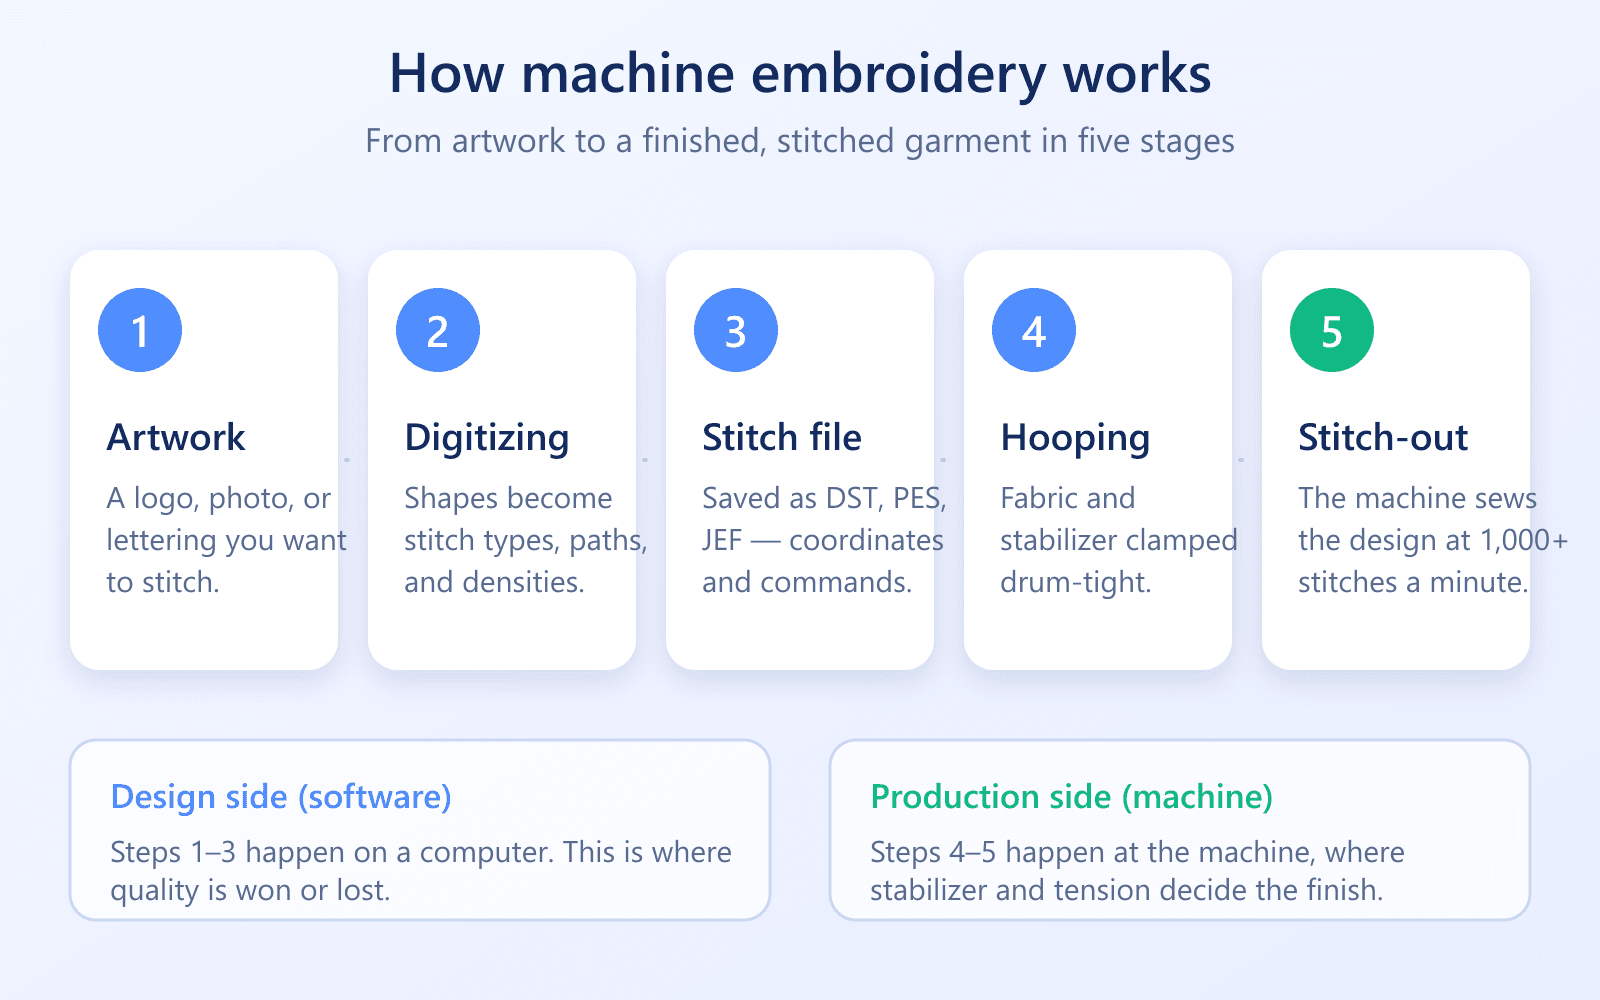
1. Start with artwork
Everything begins with a design — a logo, a piece of lettering, a photo, or a drawing. Artwork with bold shapes, clean edges, and a limited color palette translates best. Thread has real physical width, so subtle gradients and hairline detail rarely survive the trip to fabric.
2. Digitize the design
This is the most important step, and the one beginners underestimate. Digitizing (historically called “punching”) converts the image into stitches. The digitizer decides which stitch type covers each shape, the sequence the machine sews in, how dense the stitching should be, and how much to compensate for the way fabric distorts under a needle.
A pixel-based image carries no stitch information at all, so this is genuine translation work — not a file conversion. Two people digitizing the same logo can produce very different stitch-outs.
3. Save it as a stitch file
The digitized design is exported to a machine format such as DST or PES. Inside, the file is essentially a long list of coordinate moves and commands — stitch here, jump there, trim, stop for a color change.
4. Hoop the fabric
The garment is clamped between two rings of an embroidery hoop, usually with a stabilizer backing it. The fabric should be drum-tight but not stretched — stretched fabric relaxes after stitching and leaves the design puckered. Poor hooping causes more ruined garments than any other single mistake.
5. Stitch it out
The machine reads the file and sews. The hoop shuttles back and forth beneath the needle while an upper thread interlocks with a bobbin thread underneath, locking each stitch into the fabric. Multi-needle machines switch colors automatically; single-needle home machines pause and wait for you to re-thread.
The Three Stitch Types
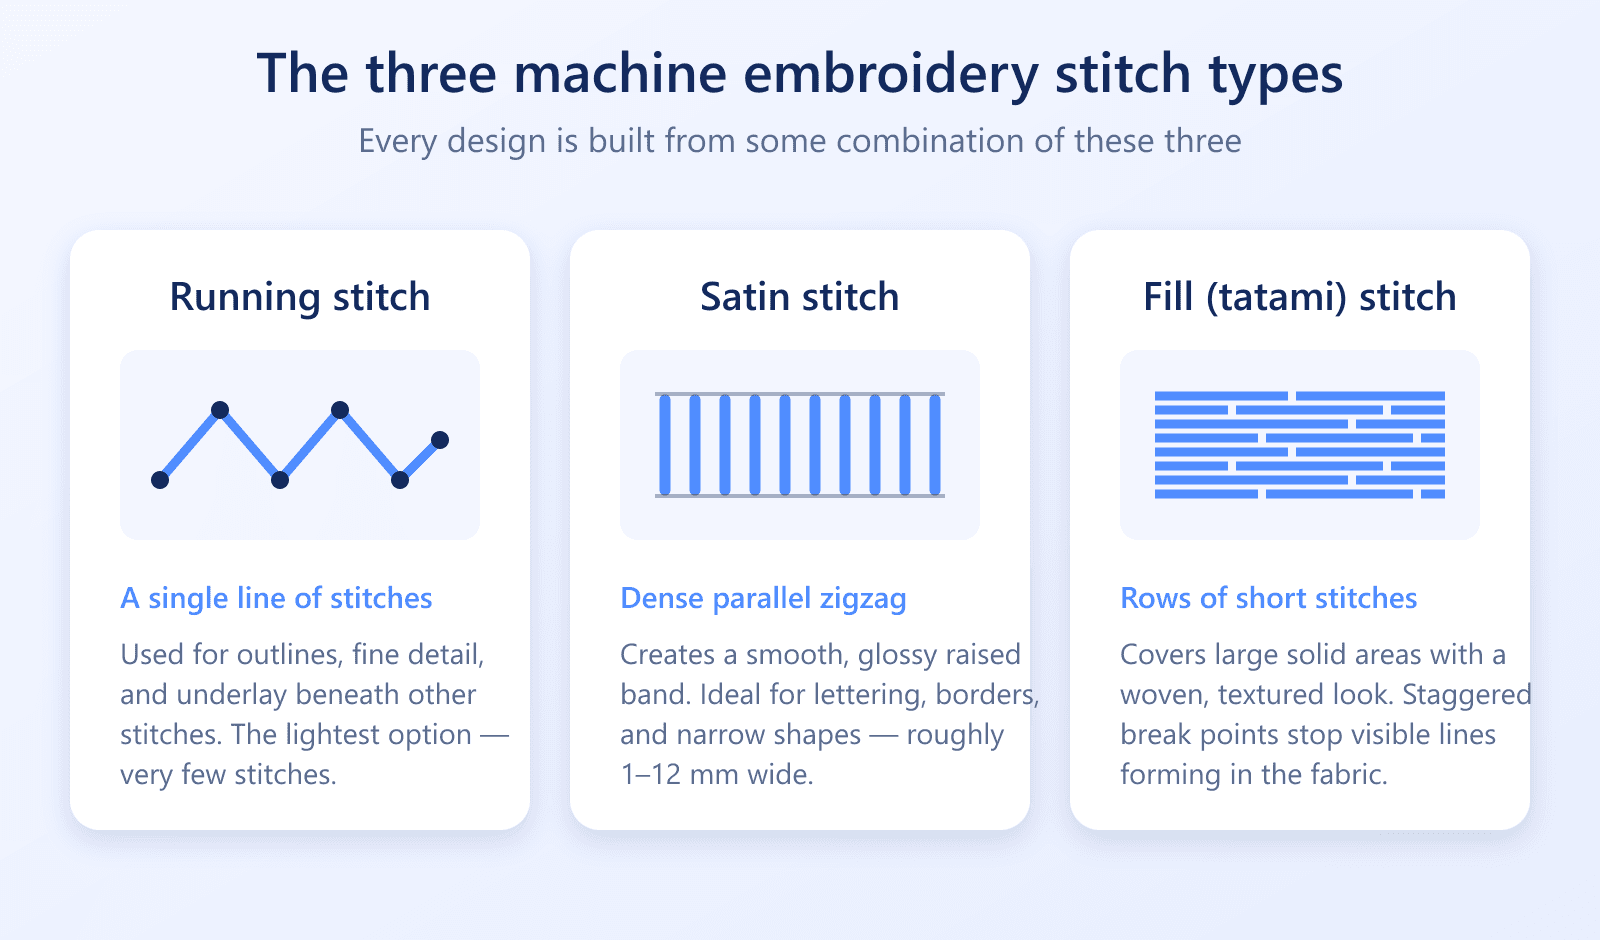
However complex a design looks, it is built almost entirely from three stitch types. Learning to recognize them makes it far easier to judge whether a design will stitch cleanly.
Running stitch
A single line of stitches following a path, exactly like a pencil line. It's used for outlines, fine detail, and underlay — a foundation layer stitched first to stabilize the fabric before heavier stitching goes on top. It uses the fewest stitches of any type.
Satin stitch
Tightly packed parallel stitches that cross back and forth over a shape, producing the smooth, glossy, slightly raised look you see on lettering and logo borders. Satin works beautifully between roughly 1 mm and 12 mm wide. Go much wider and the long floating stitches snag; go much narrower and the column disappears into the fabric.
Fill (tatami) stitch
Rows of short stitches used to cover large solid areas, giving a woven, textured surface. Good digitizing staggers the break points between rows so no visible line forms across the fill. Fill stitching is what makes big designs heavy — stitch count climbs quickly, and with it the run time and the strain on the fabric.
Embroidery File Formats
There is no universal embroidery file. Each manufacturer developed its own format, and your machine reads only some of them:
- DST — Tajima; the commercial industry standard. Stores stitches but not thread colors.
- PES — Brother and Baby Lock; includes color information and a preview.
- JEF — Janome and Elna.
- EXP — Melco and Bernina.
- VP3 / HUS / VIP — Pfaff and Husqvarna Viking.
One quirk catches nearly everyone out: DST stores no thread colors. The file describes where to stop for a color change but not which color to load, so color assignment happens at the machine or in software. If you want the full picture, our DST vs PES comparison breaks down what each format does and doesn't carry.
Turn any image into a machine-ready design
Upload a logo or photo and get a stitch file you can preview and download in seconds — no digitizing software to learn.
What You Need to Get Started
The machine
Home embroidery machines have a single needle and one hoop, and generally run from around $400 to $1,500. They stitch smaller designs well but pause for every color change. Commercial machines carry multiple needles — often six to fifteen — and swap colors automatically. A single-head commercial machine typically starts around $5,000 and climbs from there.
Stabilizer
Stabilizer is the backing material that supports fabric while it's being stitched, and skipping it is the fastest route to a puckered mess. Cut-away stabilizer stays permanently and is the right choice for stretchy knits. Tear-away is removed after stitching and suits stable woven fabrics. Wash-away dissolves in water and is used on sheer fabrics or as a topping on towels and fleece to stop stitches sinking into the pile.
Thread, needles, and bobbins
Most machine embroidery uses 40-weight polyester or rayon thread — polyester is stronger and more colorfast, rayon has a higher sheen. Bobbin thread is finer, usually 60-weight, and almost always white or black. Needles wear out faster than beginners expect: a dull needle shreds thread and mimics a tension fault, so change it regularly.
Thread tension
Tension is the balance between the top thread and the bobbin thread, and it's behind most visible embroidery faults — looping, bobbin thread showing on top, thread breaks, and puckering. Our thread tension guide covers the 1/3 rule and how to diagnose each symptom.
Common Beginner Mistakes
- Skipping stabilizer, or using the wrong type for the fabric — the number one cause of puckering.
- Stretching fabric in the hoop instead of hooping it taut; it relaxes afterwards and distorts the design.
- Expecting a photo to stitch like it looks on screen — thread cannot reproduce fine gradients.
- Digitizing text too small; satin lettering below roughly 5 mm tall becomes unreadable.
- Over-dense fills that stiffen the garment, slow the run, and stress the needle.
- Never stitching a test on scrap fabric before running the real garment.
- Ignoring stitch count — more stitches means more time, more thread, and more distortion.
Almost every item on that list is cheap to avoid and expensive to discover halfway through a production run. Test on scrap first; it's the single habit that separates clean work from ruined garments.
Check Your Design Before You Stitch
Before committing thread to a garment, it's worth inspecting the file itself. Stitch count, density, and excessive jump stitches all predict trouble on fabric. You can open any design in your browser with our free DST viewer to see exactly how it will stitch, or run it through the DST analyzer for a breakdown of stitch count, dimensions, and color stops.
Machine Embroidery as a Business
Machine embroidery scales unusually well for a small operation. Once a design is digitized, the marginal cost of each additional piece is mostly thread, backing, and machine time — so custom caps, workwear, team apparel, and personalized gifts carry healthy margins.
The realistic constraints are capacity and setup. A single-head machine embroiders one garment at a time, so large orders are limited by run time rather than demand. And every new design needs digitizing before its first stitch, which is why fast, affordable digitizing has such a direct effect on whether small orders are worth taking at all.
Frequently Asked Questions
What is machine embroidery?
Machine embroidery is the process of stitching a design onto fabric using a computerized embroidery machine. Instead of guiding a needle by hand, you load a digital stitch file that tells the machine exactly where to place every stitch, which stitch types to use, and when to change thread colors.
How is machine embroidery different from hand embroidery?
Hand embroidery is stitched manually and every piece is slightly unique, which makes it slow but highly expressive. Machine embroidery follows a digital file, so it is far faster and produces identical results every time — which is why it is used for uniforms, caps, and any job that needs consistency across many pieces.
Do I need to know how to sew to do machine embroidery?
No. Machine embroidery and sewing are different skills. You do need to learn hooping, stabilizer choice, threading, and thread tension, but the machine forms the stitches for you — you are not sewing seams by hand.
What is digitizing in machine embroidery?
Digitizing is converting artwork such as a PNG or logo into a machine-readable stitch file. A digitizer (or AI software) decides the stitch types, the order the machine sews in, the stitch density, and how to compensate for fabric pull. It is the single biggest factor in how a design looks stitched out.
What file formats do embroidery machines use?
The most common are DST (Tajima, the commercial standard), PES (Brother and Baby Lock), JEF (Janome), EXP (Melco and Bernina), and VP3 or HUS (Pfaff and Husqvarna Viking). Your machine reads only certain formats, so you may need to convert a design before stitching it.
How much does it cost to start machine embroidery?
A home embroidery machine typically starts around $400–$1,500, while a single-head commercial machine runs from roughly $5,000 upward. Beyond the machine, budget for hoops, thread, bobbins, needles, stabilizers, and digitizing — the consumables add up more than beginners expect.
Can any image be turned into machine embroidery?
Almost any image can be digitized, but not every image stitches well. Bold shapes, clean edges, and a limited color palette translate best. Fine gradients, photographic detail, and very small text tend to lose definition because thread is a physical medium with real width.
Conclusion
Machine embroidery is the bridge between a digital design and thread locked permanently into fabric. A machine reads a stitch file, moves hooped fabric beneath a fixed needle, and builds the design from running, satin, and fill stitches — quickly, and identically every time.
The machine is the easy part. Quality is decided earlier: in how well the artwork was digitized, whether the right stabilizer went behind the fabric, and whether the tension was balanced before the run started. Get those three right and machine embroidery becomes remarkably predictable.
If you're ready to try it, start with one bold design, one forgiving fabric, and a test stitch-out on scrap. You can turn your artwork into a machine-ready file in seconds with our AI embroidery digitizer — then preview it before a single stitch goes into fabric.